**Last edited 03 Jul 13
So, I recently found out what happens when a virtual machine runs out of space. Just resize the hard drive, right? Intuitively, one might think there’d be a button for that… There isn’t.
A little background: I’m on OS X 10.7.5 and VirtualBox 4.2.12
** Disclaimer: ** This could potentially destroy all data on your virtual machine. Back up all your data, and proceed at your own risk.
Here’s how to do it:
-
Shut down the virtual machine you’re trying to resize.
-
Open an OS X terminal window and navigate to the directory where your virtual machine is. Mine is in “VirtualBox VMs/Ubuntu”.
-
Clone the virtual hard drive, so you’ll have a backup:
VBoxManage clonehd Your_virtual_machine.vdi clone.vdi
If your vm is in .vmdk format, you need to convert to .vdi:VBoxManage clonehd Your_virtual_machine.vmdk clone.vdi -format VDI
You should see a progress bar. This will take at least a few minutes. -
Resize the hard drive:
VBoxManage modifyhd clone.vdi --resize 20000
(Where the number is the new size in mb.) - Create a new virtual machine:
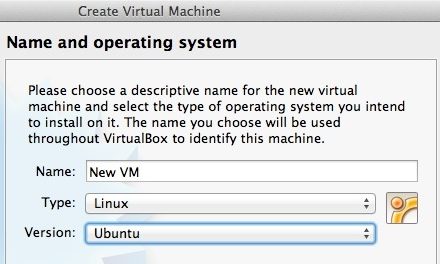
- Go back to VirtualBox and click ‘New’. Choose a new name and select the same OS and memory settings as the original.
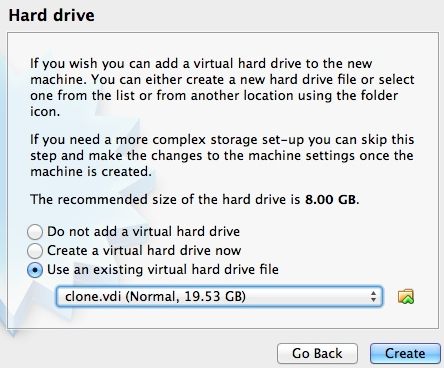
- At the ‘Hard drive’ screen, select ‘use an existing virtual hard drive file’
and choose the file you created in step 4. Click ‘Create’.
The new machine will have all the installed programs and data as the original.
- Go back to VirtualBox and click ‘New’. Choose a new name and select the same OS and memory settings as the original.
- Repartition the hard drive:
- Fortunately, someone has
already written an excellent guide:
How To Enlarge a Virtual Machine’s Disk in VirtualBox or VMware
- Skip about halfway down to the paragraph that begins “You can use a GParted live
CD…“
TIP: If you’re unable to resize your partition because there’s a swap file in the way, follow this guide: Expanding a Linux disk with gparted (and getting swap out of the way)
- Fortunately, someone has
already written an excellent guide:
How To Enlarge a Virtual Machine’s Disk in VirtualBox or VMware
- Skip about halfway down to the paragraph that begins “You can use a GParted live
CD…“
Virtualization is an amazing thing. The ability to create customized, clonable, disposable virtual computing environments is endlessly useful. If that interests you, stay tuned for my upcoming post about Vagrant.